Here’s a simple yet delicious traditional artisan sourdough loaf recipe. It results in a crusty exterior and a light, chewy, spongy texture inside, with just the right balance of sweet and sour. The ingredients are basic pantry staples: flour, water, sourdough starter, salt, olive oil, and maple syrup. These are combined, fermented, and baked in a Dutch oven to create a perfect loaf. Not only that, knowing how to make a delicious loaf will provide awesome health benefits, and you can also experience the food security that comes with obtaining a new skill.

Homemade Bread
Hello, fellow bread lovers and aspiring sourdough artisans! Have you ever considered embarking on a baking adventure and creating your own bread? If the process seemed a bit daunting, fear not! Today, we’re diving into the world of sourdough, a journey we’ll take together. You’ll discover the joy of baking and learn about the fantastic health benefits and food security of making your own bread. Let’s embark on this delicious adventure together with a little bit of humor, encouragement, and, of course, plenty of flour.
The Joy and Health Benefits of Sourdough
Why Sourdough Rocks
Sourdough bread isn’t just a tasty treat; it’s a bread that packs a punch in the health department. Here’s why sourdough should be your new baking obsession:
- Digestive Health: Sourdough bread is easier to digest thanks to its long fermentation process. It breaks down the gluten, making it an excellent option for those with gluten sensitivities (but not celiac disease).
- Nutrient Absorption: The fermentation process also increases the availability of nutrients like B vitamins, iron, and magnesium. So, you’re not just eating bread; you’re nourishing your body!
- Blood Sugar Friendly: With a lower glycemic index than other breads, sourdough helps keep your blood sugar levels stable. No more post-toast crashes!
- Natural Preservative: Sourdough’s natural acids act as preservatives, reducing the need for artificial additives. That’s what’s up!!

Food Security: Baking Your Way to Peace of Mind
Knowing how to bake your own bread can be a lifesaver in uncertain times. Here’s how sourdough baking can contribute to your food security:
- Self-Sufficiency: With just flour, water, salt, and a couple of other healthy ingredients, you can create your own delicious bread. Say goodbye to empty store shelves! This recipe requires a few extra ingredients, but you could use only a starter, flour, and water.
- Cost-Effective: Making your own bread is often cheaper than buying it, especially those fancy artisan loaves at the store.
- Less Waste: You control the ingredients and portions, reducing food waste and ensuring nothing goes to waste.
- Family Bonding: Baking bread is a wonderful activity to do with kids. It’s educational and fun, and you get to enjoy the fruits of your labor together.

How to Make an Artisan Sourdough Loaf
What You’ll Need
Ingredients
- Sourdough Starter: 3/4 cups (active and bubbly)
- Water: 1 cup
- Organic AP Flour: 3 1/2 cups
- Salt: 1 1/2 teaspoons
- Maple Syrup: 2 tablespoons
- Olive Oil: 2 tablespoons
Equipment
- Mixing Bowl or Stand Mixer
- Kitchen Scale
- Dutch oven (or a heavy oven-safe pot with a lid)
- Parchment Paper
- Proofing Basket
- Bread Lame
- Bench Scrapper
Step-by-Step Guide:
Preparing Your Starter
Artisan Sourdough Loaf; health benefits; food security

Feed Your Starter: The night before you plan to bake, feed your sourdough starter with equal parts flour and water. Let it sit at room temperature overnight until it becomes bubbly and active. If it’s not bubbly, it’s not ready. No bubbles, no troubles—give it more time.
Making the Sourdough
Ingredients
3/4 cups starter
1 cup filtered room temp water
2 tablespoons maple syrup
2 tablespoons olive oil
1 1/2 teaspoons salt
3 1/2 cups all-purpose flour
Mix the Dough:
- Once your starter is nice and active, combine 3/4 cup starter with 1 cup of water in a large mixing bowl.
- Add 3 1/2 cups of flour and 1 1/2 teaspoon of salt.
- Combine the remaining ingredients and cover the dough for 20 minutes with a damp towel.
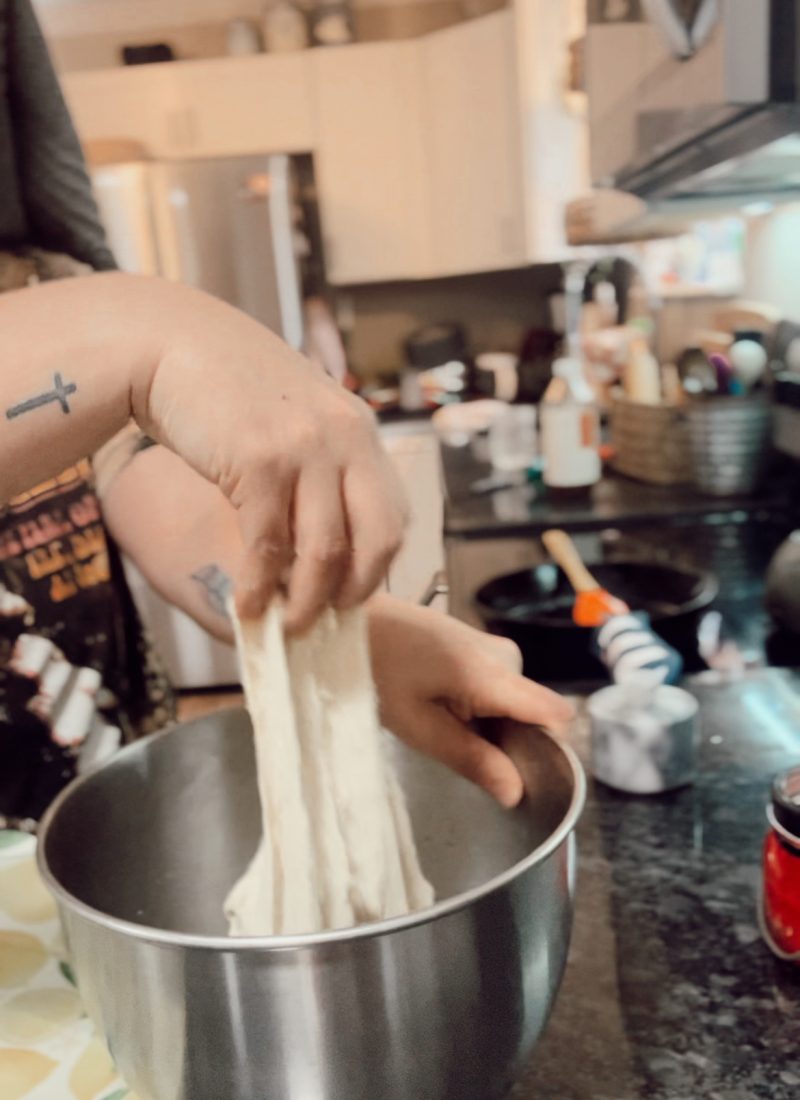
- Stretch and fold at the edges on all sides. You can do this in the same bowl. Cover with plastic wrap, beeswax wrap, or a damp tea towel.
- Allow to rest again for 20 minutes.
- Repeat the stretch and fold process. Allow to rest for 20 minutes again. (20 minute rests 3x)

Fermentation and Shaping Sourdough
First Rise:
- Once the three sets of 20-minute rest times and stretch and folds are completed, cover the dough with a damp cloth and let it rise at room temperature for 3-4 hours. The timing will be determined by the temperature in your home and outside. For example, if the weather is cooler, it will take longer to rise. If the weather is warmer (like Tennessee humidity in the summertime), it will take less time to rise. So, keep an eye on it. Sourdough LOVES a JUST RIGHT environment. The dough should double in size. Think of it as dough doing yoga—rising and stretching.
Shape the Loaf:
- Once the dough has risen, gently deflate it and transfer it to a floured surface.
- Shape the dough into a round or oval loaf. Shape it with love; it’s your edible masterpiece.
Second Rise: Cold Proofing
- Place the shaped dough into a floured proofing basket or bowl, cover it, and let it rise for another 2-3 hours on your counter. Patience is a virtue, and your bread will thank you.
- Allow to rise a second time until doubled in size – about two to four hours, depending on the temperature of the house and the maturity of your starter. Or 12-15 hours in the fridge (it will not look like it has risen much, but I promise it works).

Baking
Preheat the Oven:
- Preheat your oven to 450°F (245°C) with a cast iron Dutch oven inside for at least 30 minutes and up to an hour. This ensures the Dutch Oven is hot enough to create a nice crust. Warning: Your kitchen may start to smell irresistible.
Score the Loaf:
- Carefully turn the risen dough onto a piece of parchment paper.
- Use a bread lame, another name for a fancy razor blade, to make a few pretty slashes on the surface of the dough. This is your chance to get creative with bread art! Think all the leaves!
Bake:
- Remove the preheated Dutch Oven from the oven, carefully place the dough inside (using the parchment paper as a sling), cover with the lid, and bake for 30 minutes.
- After 30 minutes, remove the lid and bake for another 5-10 minutes until the crust is golden brown and the loaf sounds hollow when tapped on the bottom. Voilà, you’ve got yourself a beauty!
Cool:
- Transfer the baked loaf to a wire rack and let it cool completely before slicing. Trust me, waiting is the hardest part.
Checklist for Baking Artisan Sourdough
- Feed sourdough starter the night before
- Mix dough ingredients
- Allow dough to rest (autolyse)
- Knead dough until smooth and elastic
- Stretch and Fold Method
- Let dough rise (first rise)
- Shape the dough into a loaf
- Allow dough to rise again (second rise). COLD PROOFING
- Preheat oven with Dutch oven inside (30 minutes to an hour)
- Score the dough before baking (pretty, pretty creative time)
- Bake with lid on for 30 minutes, then without lid for another 5-10 minutes
- Cool completely before slicing

Artisan Sourdough Loaf; health benefits; food security
Conclusion
Baking an artisan sourdough loaf is not just about making bread; it’s about embracing a healthier lifestyle, gaining a sense of food security, and tapping into your creative side. As a mom, this skill can be incredibly rewarding and beneficial for your family. Plus, it’s a fantastic way to bond with your kids and create lasting memories. So roll up your sleeves, dust off that flour, and get ready to bake your way to happiness and health. You’ve got this!
Happy baking, and may your sourdough adventures be as fulfilling as they are delicious!

Artisan Sourdough Recipe
This is a simple yet delicious traditional artisan sourdough recipe. It results in a crusty exterior and a light, chewy, spongy texture inside, with just the right balance of sweet and sour. The ingredients are basic pantry staples: flour, water, sourdough starter, salt, olive oil, and maple syrup. These are combined, fermented, and baked in a Dutch oven to create a perfect loaf.
Ingredients
- 3/4 cups starter
- 1 cup filtered room temp water
- 2 tablespoons maple syrup
- 2 tablespoons olive oil
- 1 - 1/2 teaspoons salt
- 3 - 1/2 cups all-purpose flour
Instructions
- Feed your sourdough starter 4-12 hours before starting
- Once your starter is nice and active (lots of bubbles).
- Add sourdough starter, salt, water, maple syrup, olive oil, and flour to a large bowl and mix with your hands, or use a hook on your KitchenAid mixer with a dough hook until well combined.
- Let rest for 15 minutes.
- Stretch and fold in the edges on all sides. You can do this in the same bowl.
- Cover with plastic wrap, beeswax wrap, or a tea towel.
- Allow to rest again for 20 minutes.
- Repeat the folding process.
- Allow to rest for 20 minutes again, and then repeat the process. (20 minute rests 3x)
- Cover and allow to rise until doubled in size, about 3-12 hours, depending on your home's temperature.
- Lightly flour countertop.
- Shape the loaf with your hands, pulling it toward you to create tension.
- Please place it in a floured banneton basket. You can place a tea towel in the basket. Make sure you flour it.
- Cover with canvas basket cover. If using the tea towel, cover the loaf with the towel instead of the canvas basket cover.
- Please put it in a plastic bag and place it in the fridge overnight.
- Preheat the oven to 450.
- Place the Dutch oven in the oven and preheat for 30minutes to an hour.
- Once the Dutch oven has preheated, take the dough out ofthe fridge and place it on a sheet of parchment paper.
- Score the top of the dough, gently place the parchment paper and dough into the Dutch oven, cover it with a lid, and place it in the hot oven.
- Bake for 30 minutes with the lid.
- Remove the lid and bake for another 15 minutes until golden brown.
- Allow to cool before serving.
Notes
- If you are gluten-sensitive, I suggest getting that extra fermentation by allowing it to cold-proof for 24 hours.
- I suggest using parchment paper or a silicon bread sling. It helps lift the bread from the Dutch oven without burning your hands.
Keywords: Artisan sourdough loaf, health benefits of sourdough, homemade bread, food security, sourdough recipe, sourdough baking




Leave a Reply